To setup Counter Strike Dedicated Server on Virtual Machine running on Windows Azure you have to perform 10 steps. This blog post is going to explain all them in detail.
1. First thing you should grab is Windows Azure Account. If you dont have one, you can create trial. More information about creating Windows Azure Account you can find on Windows Azure Portal.

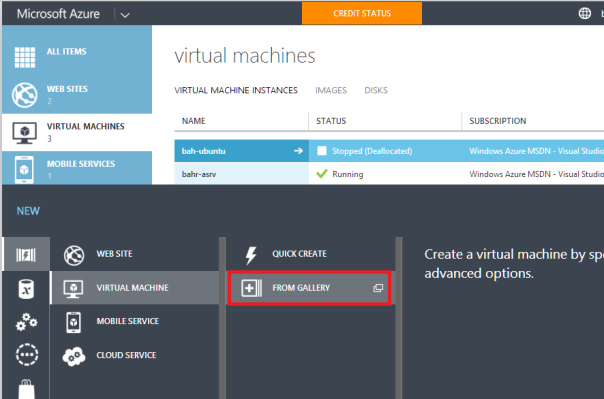
2. Create Virtual Machine on Windows Azure. Choose New From Bottom Bar and Choose: Compute->Virtual Machine-From Gallery (see pic below).
3. From List of Virtual Machine Select Windows Server 2012.

4. Setup Name of VM, default username and password, and follow instructions. After you finish with VM, by clicking Finish button, Windows Azure will create your VM in few minutes. If you need more information how to setup VM on Windows AZure please follow instruction on this link.
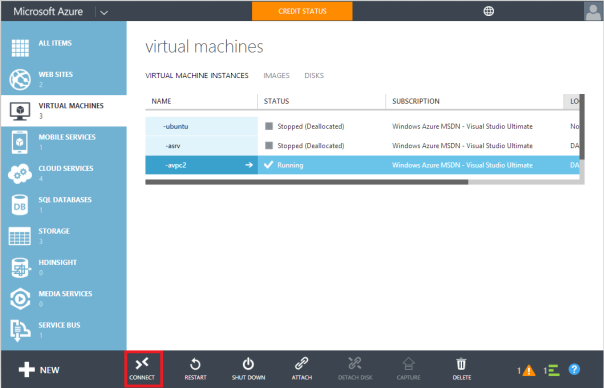
5. Download RDP Connection from Windows Azure Portal and connect to you Machine (See picture below).
6. Open your Windows Server VM and Install Counter Strike. After installation go to Counter Strike Folder and Run hlds.exe to cretae Dedicated Server. Fill the fields with the required information and choose Start Server.
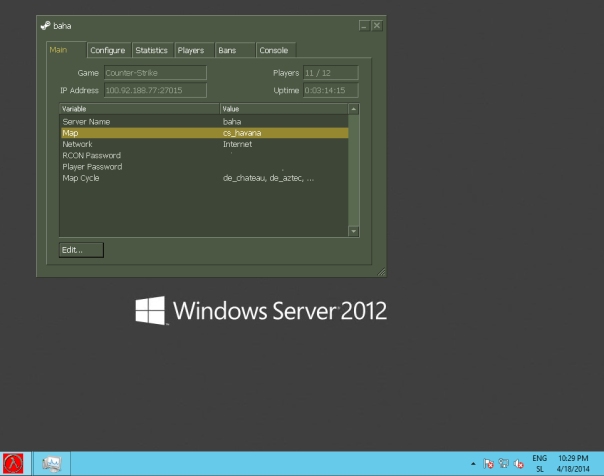
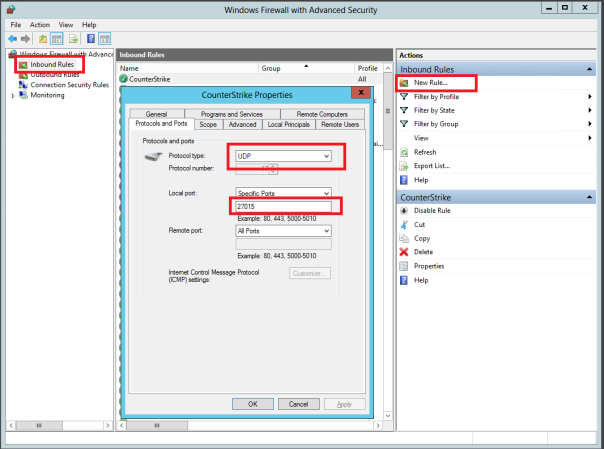
Now your dedicated server is running but no one can access it yet. We need to open default UDP port 27015 on Windows Firewall, as well as create endpoint on Windows Azure Portal.
7. Open Windows Firewall and Create Incoming and Outcoming Rule for UDP Port= 27015.
8. Go to Windows Azure Portal and create Endpoint for this UDP Port.
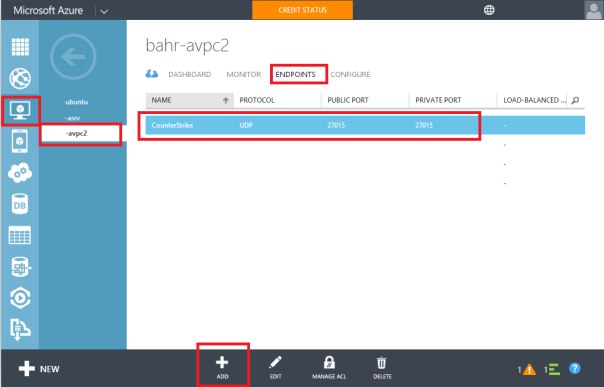
9. This is all you need to create. Go to Client PC choose Add Server and put public IP adress:27015 of you Windows Azure Machine or VMName.cloudapp.net:27015.
10. Invite your friends to play the Game by providing them with the IP and the UDP Port.
Enjoy.
Posted
May 04 2014, 08:38 AM
by
Bahrudin