Most people especially in Germany associate word “Cloud” with something what feel like “unsafe” or “unsecure”. Of course there are cases or even many cases when this cloud “thing” is likely to be unsafe or even better to express as “percept to be unsafe”. In this post I will describe highly practical Azure Cloud Service, which helps to make “thing” more secured.
How can that be? If this sounds very strange to You (cloud service make something more secured ? hahaha :) ) it means you didn’t understand what the cloud is. You have probably heard or learned only negative about it.
The service described in this post is Azure Active Directory Multifactor Authentication or shortly AAD MFA. This topic is usually an easy going for admins, but for developers it is much more difficult. The idea in this article it to build a web application, which requires users to logon via Azure Active Directory. By entering of her username and password the MFA cloud service will callback the user or send a SMS to her cell-phone. Then the user has to commit the phone call or enter the PIN sent by SMS.
Scenario
1. User starts the application by navigating to some URL.
2. Application is started and shows the publicly available home-page.
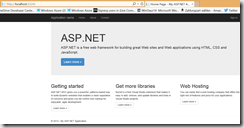
3. User has in the menu few menu items:

All menu items can be browsed without need to logon instead of item “Contact”.
4. When user clicks on item “Contact” application will redirect the user to AAD LogOn page:
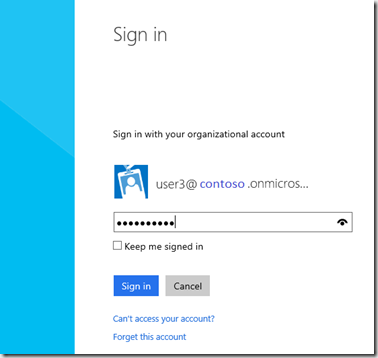
5. User enters her credentials (username and password) and clicks “Signin” button.
6. Multifactor Authentication service which is running in cloud sends a SMS message to the cell-phone of the user
or it calls the user on the phone of her choose.
This is what user will see while the service is processing multifactor authentication:
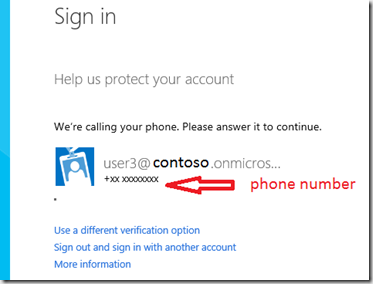
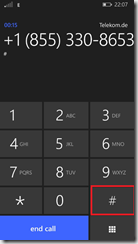
6.a. If the user has been called it presses the “#” button on the phone’s keyboard to authenticate.
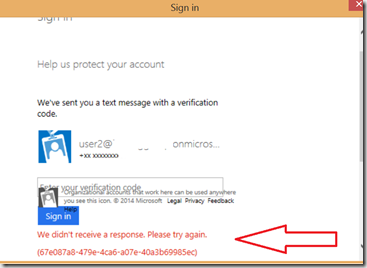
6.b.If the user has received the SMS, it must enter it in the LogOn screen:
6.c User didn’t response correctly
7. If user has been successfully authenticated it is redirected to application as logged-in

Let’s make it.
To make all working we will have to (1) create an application, to (2) register it in AAD and finally to (3) activate Multifactor Authentication.
1 Create the ASP.NET MVC application (developers)
This topic describes step-by-stem how to create an ASP.NET MVC web application, which is protected by OpenID and Azure Active Directory. All steps described here require developer skills.
If you are an admin, you should obtain this application and go to step 2, which describes how to setup AAD for this application.
1.1 Create ASP.NET MVC application without authentication
Now click on Change Authentication and set it to “No Authentication”.
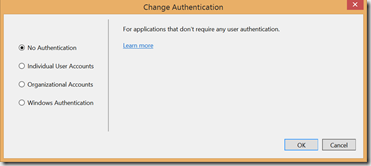
In fact you can select Organizational Account. This would create more or less all you need. However I want do describe here what is going on under the hub.
So we will start with unprotected application and build it to AAD Auth. After this we will include multifactor authentication.
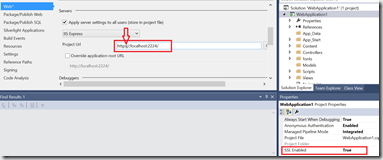
1.2. Enable SSL
Set SSL Enabled to be True. Note the SSL URL. In the project properties, Web properties, set the Project URL to be the SSL URL.
1.3. Activate OWIN Authentication
Now we need to add few OWIN assemblies to enable authentication via NuGet:
- Microsoft.IdentityModel.Protocol.Extensions
- System.IdentityModel.Tokens.Jwt *this one is usually automatically installed with the first one.)
- Microsoft.Owin.Security.OpenIdConnect
- Microsoft.Owin.Security.Cookies
- Microsoft.Owin.Host.SystemWeb
Make sure that Startup.cs OWIN initialization file is created
public partial class Startup {
public void Configuration(IAppBuilder app)
{
ConfigureAuth(app);
}
}
If you use some older template this file might be missing. You can create it with the code shown above. In this case I would recommend to install ALL Visual Studio updates.
After that create the file Startup_Auth.cs under the folder App_Start.
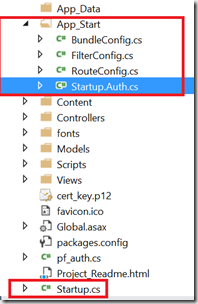
Then place following code in Startup_Auth.cs and include required namespaces.
[assembly: OwinStartup(typeof(TodoListWebApp.Startup))]
public partial class Startup
{
private static string clientId = ConfigurationManager.AppSettings["ida:ClientId"];
private static string appKey = ConfigurationManager.AppSettings["ida:AppKey"];
private static string aadInstance = ConfigurationManager.AppSettings["ida:AADInstance"];
private static string tenant = ConfigurationManager.AppSettings["ida:Tenant"];
private static string postLogoutRedirectUri = ConfigurationManager.AppSettings["ida:PostLogoutRedirectUri"];
string authority = String.Format(CultureInfo.InvariantCulture, aadInstance, tenant);
public void ConfigureAuth(IAppBuilder app)
{
app.SetDefaultSignInAsAuthenticationType(CookieAuthenticationDefaults.AuthenticationType);
app.UseCookieAuthentication(new CookieAuthenticationOptions());
app.UseOpenIdConnectAuthentication(
new OpenIdConnectAuthenticationOptions
{
ClientId = clientId,
Authority = authority,
PostLogoutRedirect_Uri = postLogoutRedirectUri,
});
}
}
} |
1.4. Create Layout Files
As next we need to add a file _LoginPartial.cshtml, with following content:
| @if (Request.IsAuthenticated)
{
<text>
<ul class="nav navbar-nav navbar-right">
<li class="navbar-text">
Hello, @User.Identity.Name!
</li>
<li>
@Html.ActionLink("Sign out", "SignOut", "Account")
</li>
</ul>
</text>
}
else
{
<ul class="nav navbar-nav navbar-right">
<li>@Html.ActionLink("Sign in", "SignIn", "Account", routeValues: null, htmlAttributes: new { id = "loginLink" })</li>
</ul>
}
|
As next In the Views --> Shared folder, add the green line in the content of of _Layout.cshtml
| <div class="navbar-collapse collapse">
<ul class="nav navbar-nav">
<li>@Html.ActionLink("Home", "Index", "Home")</li>
<li>@Html.ActionLink("About", "About", "Home")</li>
<li>@Html.ActionLink("Contact", "Contact", "Home")</li>
</ul>
@Html.Partial("_LoginPartial")
</div>
|
Layout correction described above will append SignIn (SIgnOut) menu item in the application
and route requests to required controller actions.

1.5. Create Account Controller
Now we need to create the AccountController, which will perform the authentication.
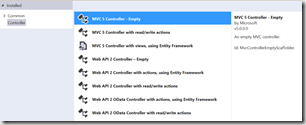
Now paste following code in Account Controller.cs:
|
using System;
using System.Collections.Generic;
using System.Linq;
using System.Web;
using System.Web.Mvc;
// OWIN
using Microsoft.Owin.Security;
using Microsoft.Owin.Security.OpenIdConnect;
using Microsoft.Owin.Security.Cookies;
using TodoListWebApp.Models;
namespace TodoListWebApp.Controllers
{
public class AccountController : Controller
{
public void SignIn()
{
// Sends an OpenID sign-in request.
if (!Request.IsAuthenticated)
{
HttpContext.GetOwinContext().
Authentication.Challenge(new AuthenticationProperties { RedirectUri = "/" },
OpenIdConnectAuthenticationDefaults.AuthenticationType);
}
}
public void SignOut()
{
// Sends an OpenID sign-out request.
HttpContext.GetOwinContext().Authentication.SignOut(
OpenIdConnectAuthenticationDefaults.AuthenticationType,
CookieAuthenticationDefaults.AuthenticationType);
}
}
}
|
2 Register the application in Azure Active Directory (admins/devops)
2.1 Register the application in AAD
Go to Azure Portal and navigate to Active Directory.

Here you can create new AD (tenant) or use an existing one. I will use the existing tenant. After I selected the tenant I clicked on the menu item “Applications”>
As you see in the next picture, I already have few sample applications.

Let’s create the new one. Independent how your project is named, you can name it a more reasonable way in the AAD.
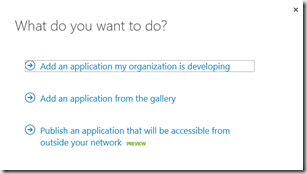
Click on “Add” on the button of the page and then select the “Add an application my organization is developing”.
 |  |
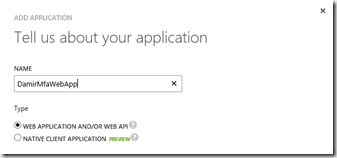 | In the next step you need to make a decision between a native client application (Windows Store App, Desktop Application or similar) and Web Application (application which we are developing).
Finally chose the name of the application. |
In the next step we need to define two more attributes. First one application URI, which can be obtained from project settings:

Copy the URL(note: It is starting with httpS) and paste it in the Sign-On URL field.
After you deploy your application to the web or intranet you can change this URL.
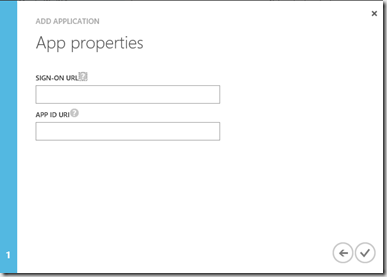
The next value APP ID URI should be formed as:
/YourApplicationName">/YourApplicationName">https://<your_tenant_name>/YourApplicationName
For example:
https://contoso/damirmfawebapp
After you are done the application will be created. Click on configuration se all important settings at once.
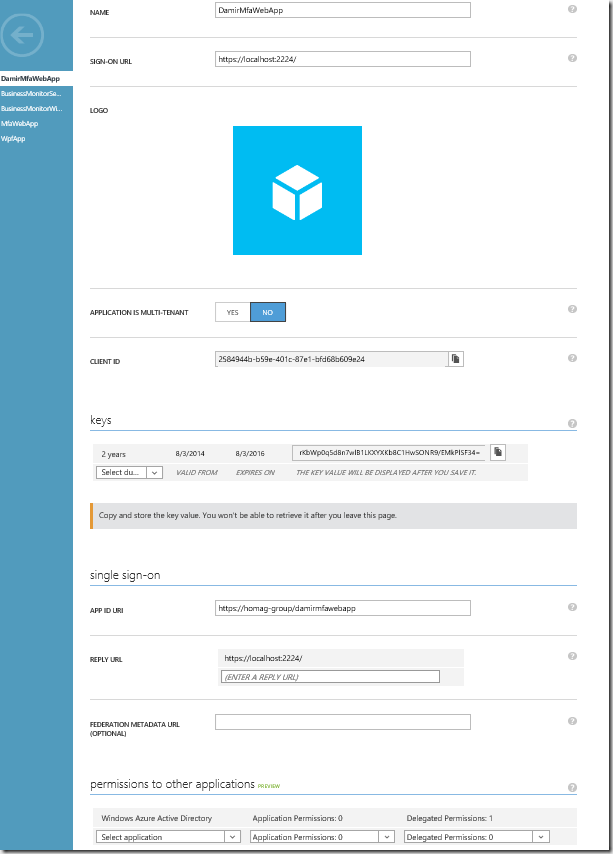
As next go to keys section and create one key.

Finally “Save” the page and the key will appear:

2.2 Connect your application with AAD
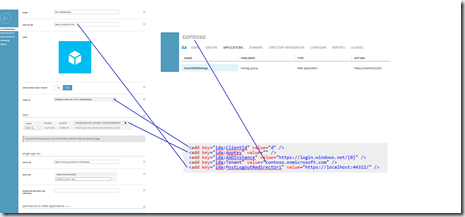
In this step we need to setup few app-settings which connect your application to AAD. In my opinion this is most critical part.
If you make a single mistake here, it will be probably very difficult to find out the reason for error which you will get.
<appSettings>
<add key="webpages:Version" value="3.0.0.0" />
<add key="webpages:Enabled" value="false" />
<add key="ClientValidationEnabled" value="true" />
<add key="UnobtrusiveJavaScriptEnabled" value="true" />
<add key="ida:ClientId" value="d" />
<add key="ida:AppKey" value="" />
<add key="ida:AADInstance" value="https://login.windows.net/{0}" />
<add key="ida:Tenant" value="contoso.onmicrosoft.com" />
<add key="ida:PostLogoutRedirectUri" value="https://localhost:44322/" />
</appSettings> |
To make this step easier I created the picture of management portal with all required values at once and
provided mappings between values in portal app-settings in application configuration file.
3. Activate Multifactor Authentication (admins/devops)
If you did all right, but you didn’t perform this last step, application will work with AAD OpenID authentication, which is username+password over SSL.
To activate MFS you have to create so called MFA provider:

After it is created it will appear under Active Directory

Here you can manage all required provider settings.
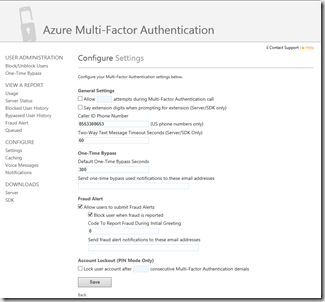
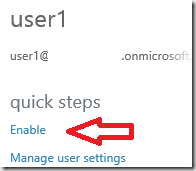
And finally the user must also be enabled for MFA.
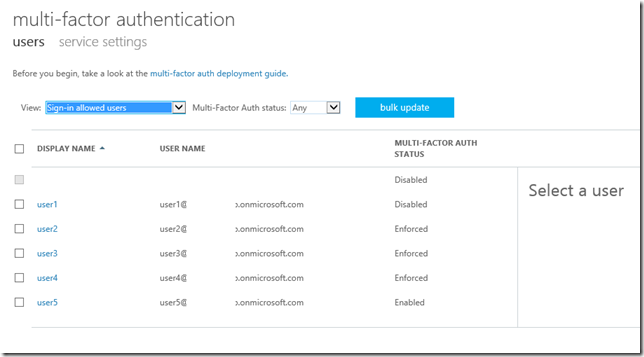
To do this go to azure management portal and enter “users” menu of the AAD tenant.
ON the bottom of the page you can enter the MFA settings.

By selecting of the user in the list below, you can enable or disable MFS of each user.
Recap
Hope this article helped a bit to understand how to integrate MFA in your application. I also hope that it clearly shown how to cloud can be used to protect something instead of simply storing your sensitive data on perceptually “unsecured” place :)
If you want to know more about this,take a look on this article, which shows how to protect your WebApi with AAD and how to create a Windows Store App, which consumes that WebApi. http://developers.de/blogs/damir_dobric/archive/2014/07/03/how-to-protect-webapi-with-azure-active-directory.aspx
Posted
Aug 03 2014, 11:08 PM
by
Damir Dobric