This article describes how to integrate a custom authorization system in one ASP.NET application. The idea behind custom authorization is very simple.
Imagine your application is using authentication providers like Facebook, Twitter, Azure Active Directory etc. All these providers will provide you an OAuth token with a set of claims, which
obviously have some meaning in context of a token provider. However, none of them provide claims which are relevant to your organization. Some of providers like Azure Active Directory can be tweaked for that purpose to support some claims, but this is not really a nice solution when working with many applications (microservices). Typically applications (microservices) have different requirements, which are very difficult to unify in context of security.
Think about IoT and devices. They deal with authentication and authorization differently. Imagine one service which is consumed by one device and one user. Device uses some built-in authentication mechanism and user uses Azure Active Directory.
Question: How to implement authorization in your service? And what to do if you have more such consumers and more such services? Authorization is this context is very simple to explain.
Somebody invokes service operation called GetOrders(). Your task is to to implement a system which basically says “device435’ and user ‘hammilton345’ can invoke it for orders with ID < 40234.
Please try to do this with any Token Provider service and you will see, that this does not work. Because STS is designed to provide you tokens. Most of samples which you can find in internet are mostly focused to authentication.
It means once user is authenticated it can access all operations (methods/actions). This is an implicit authorization. This is why most people think “authentication”, when they talk about security.
In more complex applications especially in distributed systems and microservices, this is not very practicable approach. If you ever worked in enterprises with many applications and interfaces you probably know why?
By decoupling authorization you are additionally involving a new security layer. Even your token provider get attacked, your authorization system is still in function.
To ilustrate how this work in .NET you would typically do something like this:
[Authorize(‘UsersWhoCanCallThisOperation’)
public void GetOrders(dynamic app)
{
. . .
}
By decorating the operation with attribute, you want to indicate, that only users who are in role of ‘UsersWhoCanCallThisOperation’ may call this operation. This is very easy
and architecturally nice way (aspect oriented) to request authorization by the framework. But the problem is that Facebook and most other providers do not provide you any way to
attach any kind of roles/claims to your token. One of providers which was able to do that is Azure Access Control Service. Some other providers like Active Directory have been used for this purpose by adding complex group structures.
This blowed up the size of tokens. Every time some application (i.E. Exchange) wants to have token, it will always get all groups even if they are not needed.
Situation becomes even more complicate, when you decide to use multiple authentication providers in your application, which is increasingly popular scenario. In other words, your application
has to use Facebook, Twitter and some custom authentication provider. Now you have to decide which of these token providers will be required to provide claims/roles for authorization?
The answer is probably “No one”, because modern application use outsourcing authentication strategy. By peeking one token provider for this purpose you would tightly couple your application
to your provider. In that case you become dependent on this provider. But this is not the only reason why to do that. In a world of massive integration, distributed systems and especially microservices,
it is very important to have a system which provides very easy and transparent authorization rules across all of your services.
The right solution for this requirement would be to completely decouple authorization system of token provider. We at daenet have been using this strategy for almost one decade now. The system which we used
is called Daenet Security Manager, which is successfully integrated in many customer projects. This open source solution enables you to define many applications, users, groups and roles.
It consists of a Silverlight UI and WCF Web Service (guess: we started with this almost 10 years ago).
Basically, we use Security Manager to organize applications and microservices and apply users to them. In context of an application we can specifies
which users belongs to which groups. Finally every group contains a set of roles. And of course all this support parent, child relation ship including
implicit role and group propagation form parent to child.
If I have such system, I would like to integrate it in my application (service) as easy as possible. This article shows how to that.
To understand how authorization is decoupled take a look on following example. Imagine you your application is using Azure Active Directory as token provider. If so, somewhere in the code
of your Action (operation in WebApi) or MVC controller, you can insert following line of code:
actionContext.RequestContext.Principal.Identity
In a case of AAD (Azure Active Directory) identity will be of type ClaimsIdentity, which means that there is a property ‘Claims’ on identity instance.
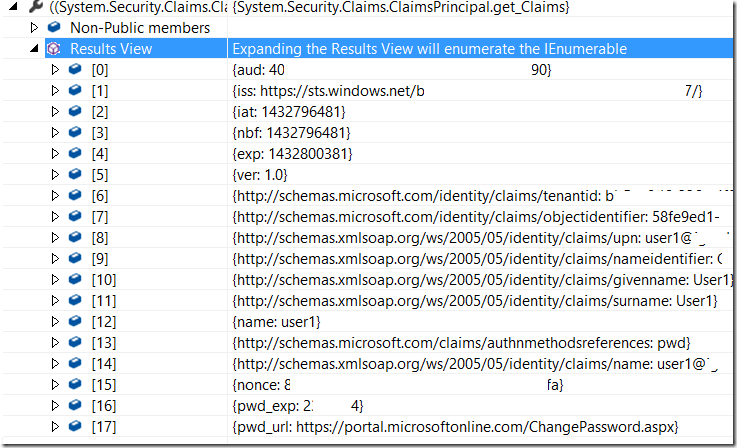
Following picture shows (obfuscated) how claims look like. By default, you can decorate your operations (actions) with claims of Role-type. But as you se no any such claim is in there.
Assume you want to inject in the list of claims your claim with name ‘UsersWhoCanCallThisOperation’’' and decorate your operation GetData as already shown above. All you have to do
is to decorate your operation with ScmAuthorizeAttribute. This will do the magic.
[ScmAuthorizeAttribute(‘UsersWhoCanCallThisOperation’)]
public ExpandoObject GetTool(string num, int? ver)
{
…
}
Before operation is executed the code behind that attribute will be executed. This code first checks if the token is authenticated by authentication of your choice (in this example AAD). If so,
roles for that identity will be looked up by some external system. First question here is, how the system does know how to lookup the right user.
For this purpose in the configuration (see later in this article) you can set the attribute ‘nameClaim’, which basically defines which of claims (see picture below) will be use for lookup operation.
Typically we use name claim ‘http://schemas.xmlsoap.org/ws/2005/05/identity/claims/name’, but you can use any. So when nameClaim = ‘user1’, the authorization system will search for ‘user1’ and get his roles.
ScmAuthorizeAttribute provides extensible external lookup. That means you can inject any kind of provider to lookup roles. NuGet Package, which we ship provides a MockRoleProvider which is delivered in your solution with source code (see later).
Additionally we provide a Security Manager Role provider, which is by default used if you don’t want to inject your one. In other words, if you don’t want to use SecurityManager for any reason, you can still use our NuGet package and inject your own provider. Security Manage Role Provider is implemented as internal class in SecManAuthorizationModule and communicates with Security Manager SOAP Web Service to lookup user’s roles.
Following picture shows roles as delivered in AAD OAuth token. This is the list of claims before ScmAuthorizeAttribute has started.
After code behind ScmAuthorizeAttribute has successfully completed, the list of roles is extended.
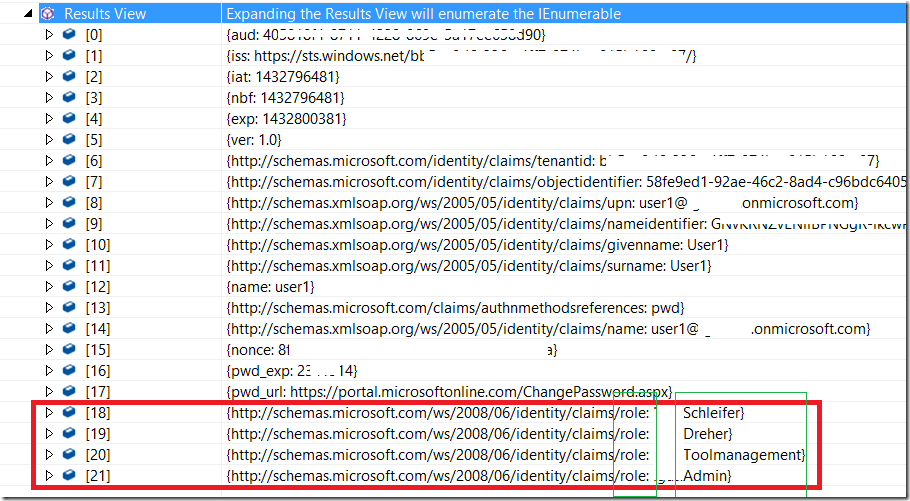
As you see, the system has merged original claims with the list of custom claims (of role type). Now you can decorate your operations with any of roles 18-21.
Hello World
To demonstrate the idea of Authorization Decoupling, let’s create an WebApi REST Service and protect it by external authorization system.
First, create the new Web Application. We will create now a Web Application, which hosts REST Web Service. In the world of Azure this is called API App.
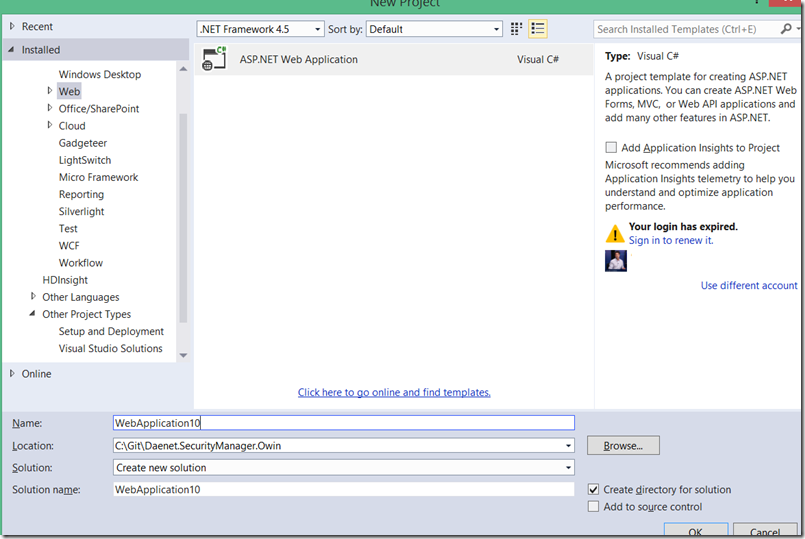
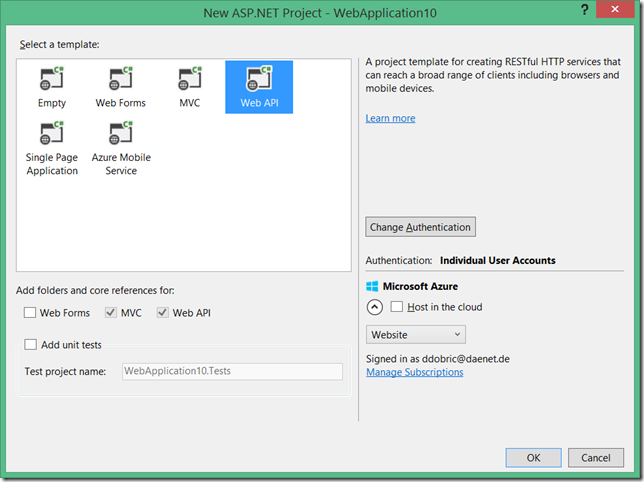
And, chose Web API. Note, you can do this with any kind of application which is running .NET or possibly some other framework.
Right, not I will focus on building REST based microservice only.
Add OWIN Middleware via NUGET Package
As next, add DaenetSecurityManagerOwin NuGet package. This package provides OWIN middleware for external authorization.
By default external authorization uses Security Manager. This package also installs one test Authentication provider and Authorization Provider.
In the real world you will not use any of them. But while developing (like now) you might not have an authentication system and also not installed Security Manager.
For this purpose you can use these two providers. Note you don’t have to use both in the same time. In this example I assume that we have a fresh new applciation,
which has no authentication and no Security Manager is installed.
Let’s install the package. Don’t be confused with the picture. I’m installing the package from the local repository. You will use the NUGET online repository as usual.
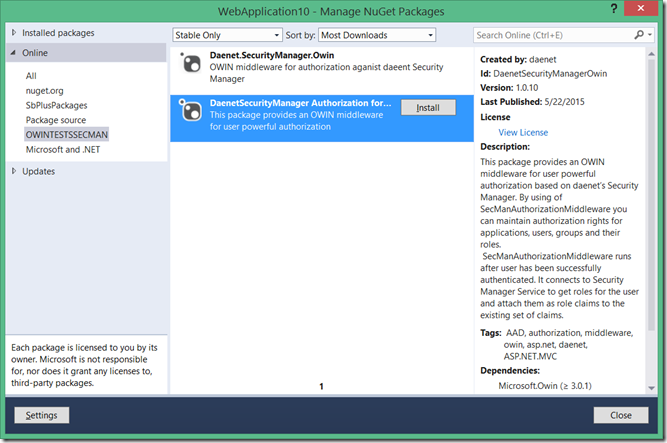
This package will download required components, but it will not change anything in your application, instead of web.config.
If the application does not compile or start after installing of the package, you should complain by guys who built NuGet :).
This is the reason why we do not activate our components automatically.
Anyhow, this picture shows, what the package has installed:
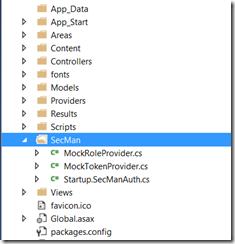
As you see, we created a single folder ‘SecMan’ and put 3 files in there. StartupSecManAuth.cs contains a code for initialization of required OWIN middleware.
MockToken provider is simulator of token provider. You do not have to use that one, if your application already uses some provider. But if don’t, you can use it, because it is very easy to configure and you can step through it in debugger
to get a feeling how all authentication system works in OWIN middleware. Typically, one token provider is external to your application (in modern world at least, it should be). By using of this provider,
we inject the endpoint for authentication directly into your web application. This just helps you to get productive. At the end you will anyhow use real authentication provider.
Configure the Middleware
As next, choose providers, which you want to use and configure them.
Please navigate to Startup.cs, and comment out existing ConfigureAuth(app) line of code. This will disable existing Authentication, if you have one.
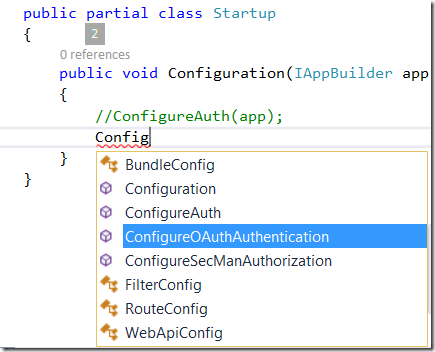
Then include following two lines, which activate authentication and authorization respectively. If you want to keep your existing authentication, then let ConfigureAuth and comment out ConfigureOAuthAthentication.
As you see authentication and authorization are by default (in OWIN) decoupled, for good reason.
public partial class Startup
{
public void Configuration(IAppBuilder app)
{
//ConfigureAuth(app);
ConfigureOAuthAuthentication(app);
ConfigureSecManAuthorization(app);
}
}
Installation of the package added few more lines in web.config. We injected in diagnostic section a TraceSource and Service Model section. I will explain them in the next post in more detail.
ServiceModel is the WCF section which must provide client endpoint with URL of the SecurityManager Web Service. If you use your own Role Provider you will not need this section at all.
For example, the MockRoleProvider described here, does not use ServiceModel section, because it does not use SecurityManager at all.
Please note that this document does not describe Security Manager!


Following picture shows two methods for configuration of Authentication and Authorization.
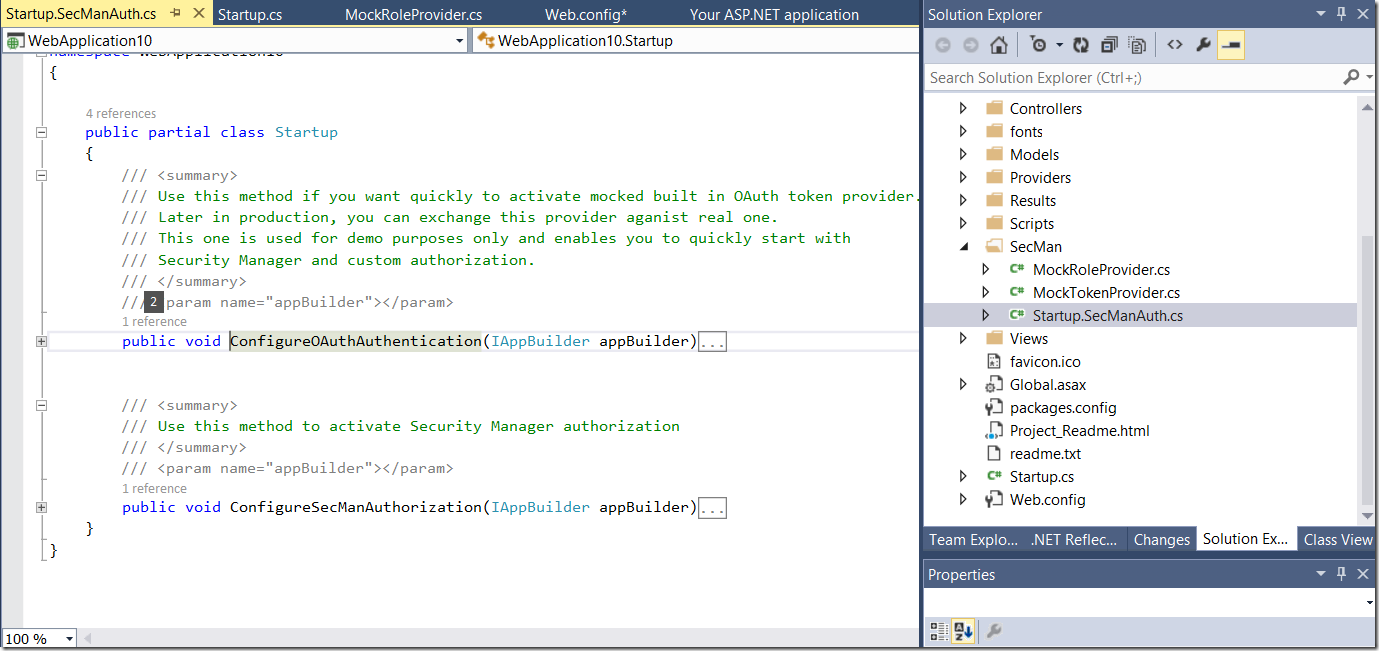
To initialize Security manager authorization, we provide a class SecManMdwOptions. First parameter (GUID) is the application identifier of Security Manager. Every application
registered in SecurityManager has an identifier. You simply open the application in the admin console and copy that number. Here is one example.
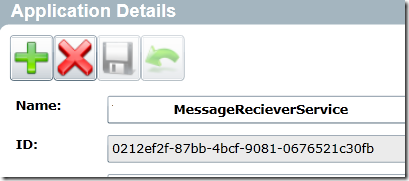
Second parameter is the name of claim from authentication provider which will be used to lookup the user. This is typically name-claim. But if you use Facebook
for authentication email address claim would be possibly more suitable. Last parameter is optional one. It is the instance of the RoleProvider, which provides a roles for user.
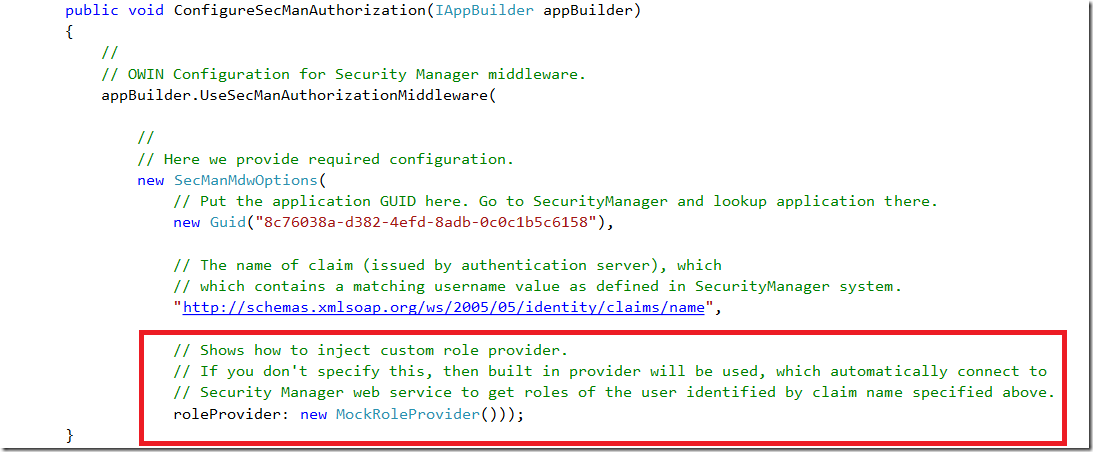
This is the interface, which role provider must implement. As already mentioned we ship with NugetPackage the MockRoleProvider with source code, so you can play with.
As you see, there is one method only to implement. We pass the original identity materialized from OWIN token (independent on provider) and you return set of roles, which might be
stored in XML, JSON, SCW file or anything else. To simplify process of role maintenance we provide Security Manager with the Web Service, Administration console and a command line tool.
namespace Daenet.SecurityManager.Owin
{
/// <summary>
/// Defines a module to be used for authorization. You can implement any module here which
/// performs authorization of identity. By default, Daenet.SecurityManager.Owin provides a module
/// which authorize against Security Manager. However you can inject some other module in the SecManAuthorizationMiddleware,
/// which can be used for authorization. This can also be used to mock Security Manager system if not yet installed.
/// </summary>
public interface IRoleProvider
{
/// <summary>
/// Gets roles of identity which will be appended to existing identity roles.
/// Identity contains already a set of roles provided by authentication server.
/// This method returns set of roles of idenity from authorization module (server).
/// </summary>
/// <param name="identity">Identity as provided by authentication server.</param>
/// <param name="nameClaim">
/// The name of identity as known by authorization system.
/// </param>
/// <param name="properties">List of properties required by authorization module.</param>
/// <returns></returns>
ICollection<string> GetRoles(ClaimsIdentity identity,
string secManIdentityName);
}
}
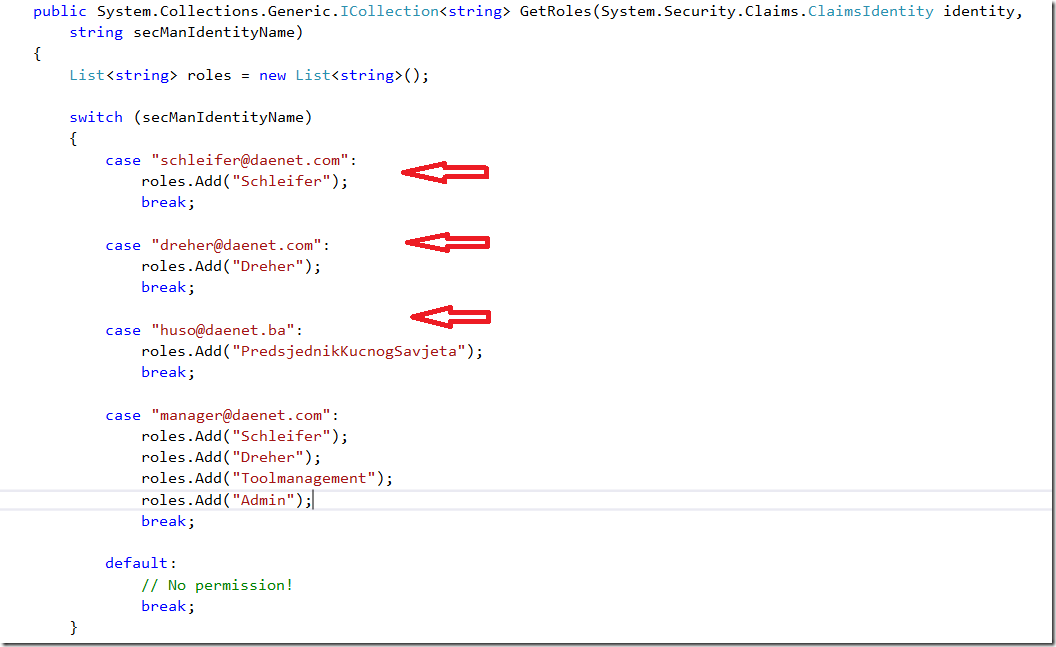
If the role provider is not set, we will inject automatically a role provider which integrates the Security Manager into your application. Here is a simple example of implementation of test role provider which we
ship. As you see we just (hard-coded) check the name of the user and return few roles.
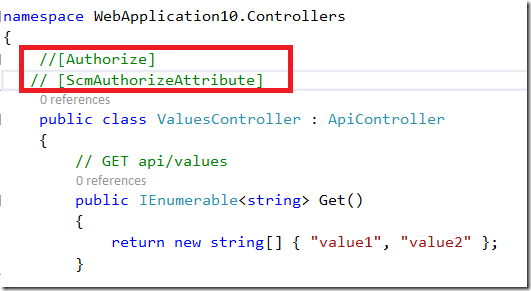
Before we start this sample, ensure that API is set for anonymous access (just for testing purposes).
Start application, wait i bit and thenenter the URL of your API: http://localhost:6093/api/values.
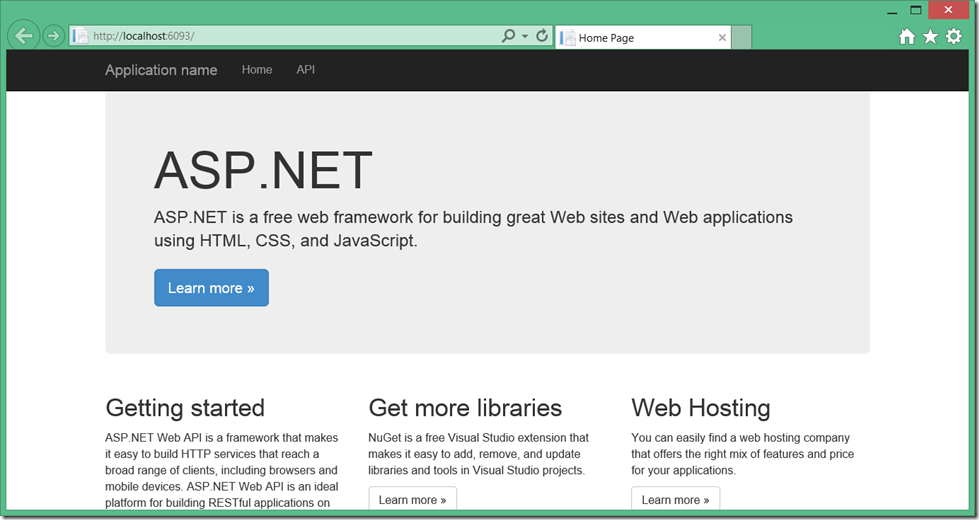
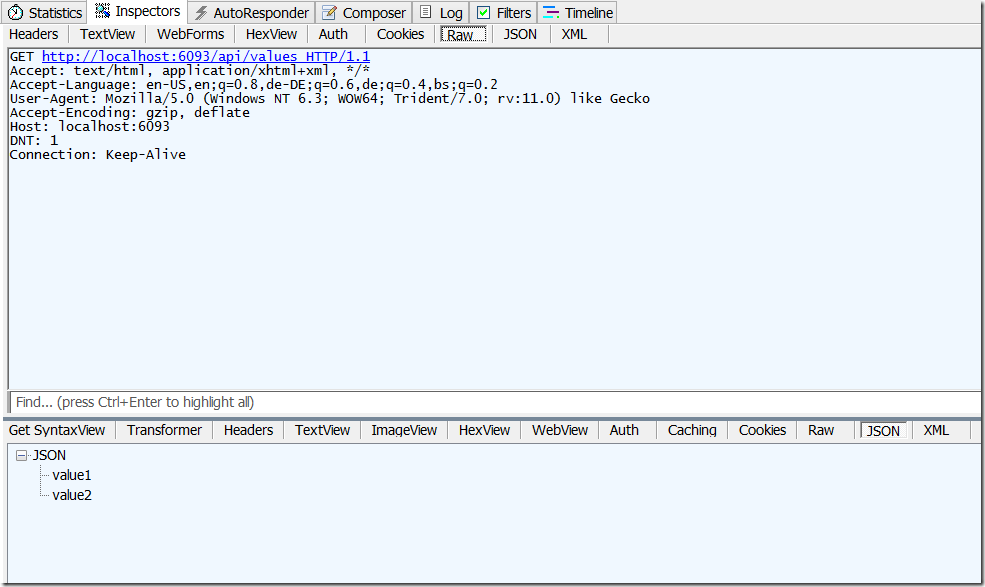
In fiddler this will look like shown at the next picture. As recap, I didn’t authenticate and all works.
Activate Authorization
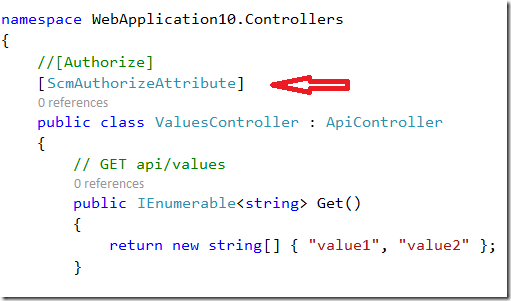
Now, lets include the attribute ScmAuthorizeAttibute. This will protect all Operations calls on your service. This is in fact the Authorization as typically used in
most application. In other words this is not really an authorization concept. If your application works this way you are authenticating but not really authorizing.
This is not unsecure, because you will authorize too, but all operations for all roles. In the world of distributed systems and microservices this is not very good concept.
Try to call the API now and you will get Access Denied.
As next, lets try to authenticate. To do this I will use custom authentication OAuth mock provider MockTokenProvider, which we also ship with NUGET with source code.
For testing purposes I will create a console application which should consume our service.
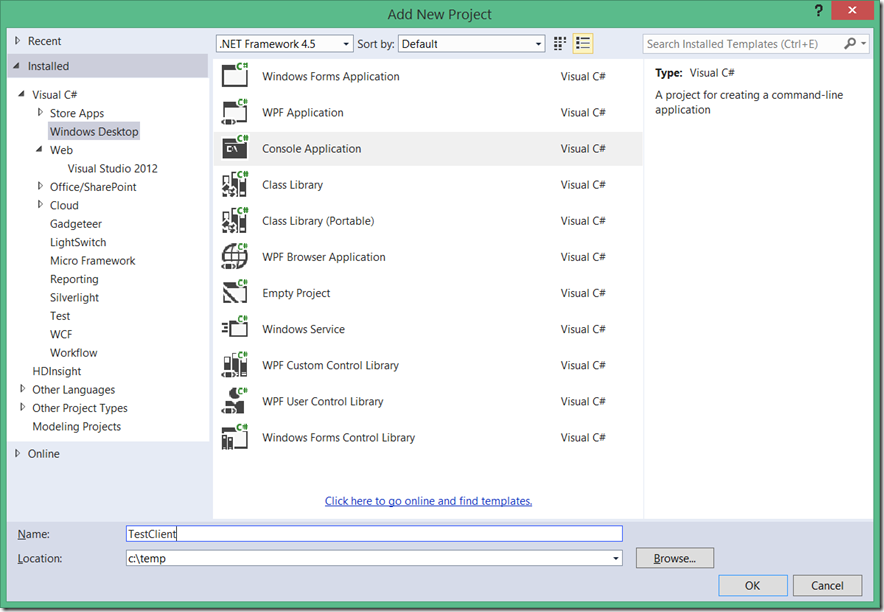
Then I will add a package SecManOwinTestConsole.
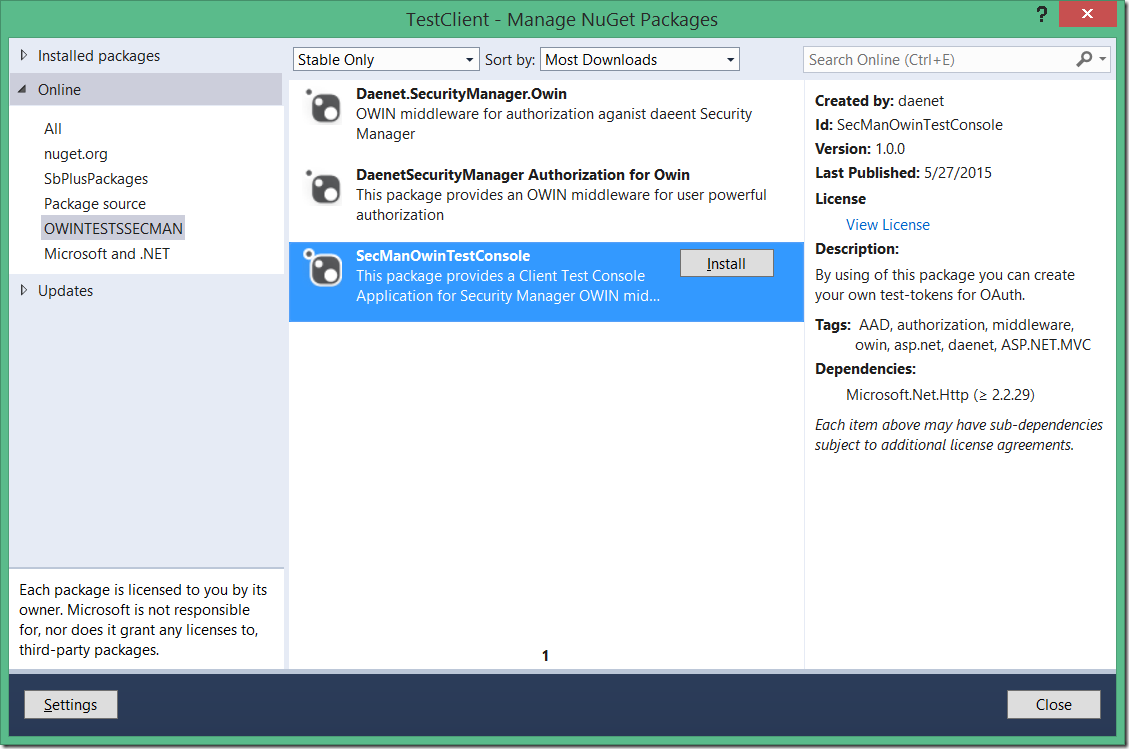
This will add TokenProvider.cs and Sample.cs files into the project.
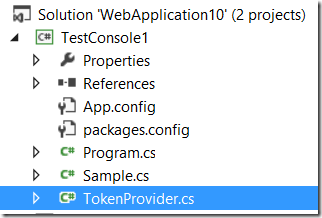
Then add following code in the Program.cs :

Finally
add the service URI in the sample.cs
string baseAddress = http://localhost:6093/;
Now you can start the client. When started it will first create a request to obtain the token from service and then invoke the service operations.
The token will be created for user, which is specified in following line of Sample.cs:
m_tokenDictionary = await provider.AcquireToken("manager@daenet.com", "password");
Our MockTokenProvider will issue token for all users, which have password = ‘password”.
take a look in the Sample.cs for more information. If all works fine you will get result as this one.
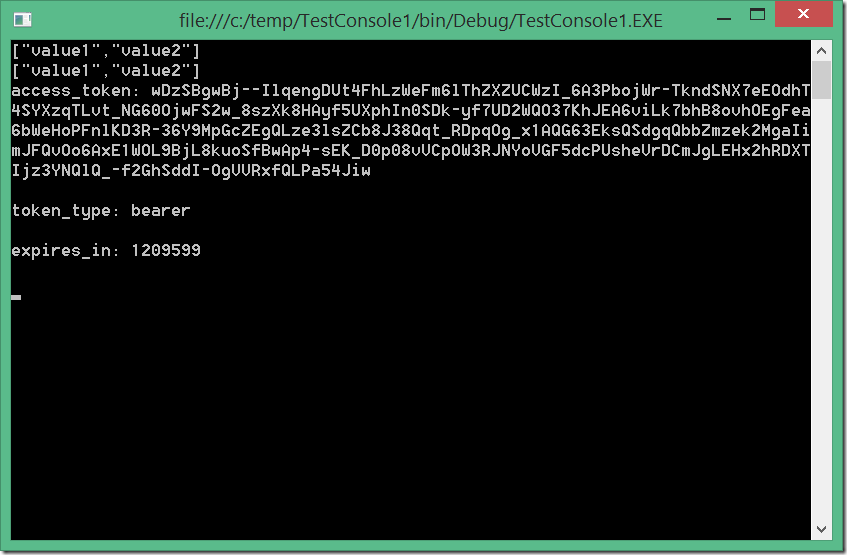
Till now we enabled the client to authenticate and we authorize it to access all operations, which is as already mentioned, not really good praxis.
We want now to implement real authorization on operation level. For example, lets protect an operation to be accessible only for users which are in role
of ‘Toolmanagement’.
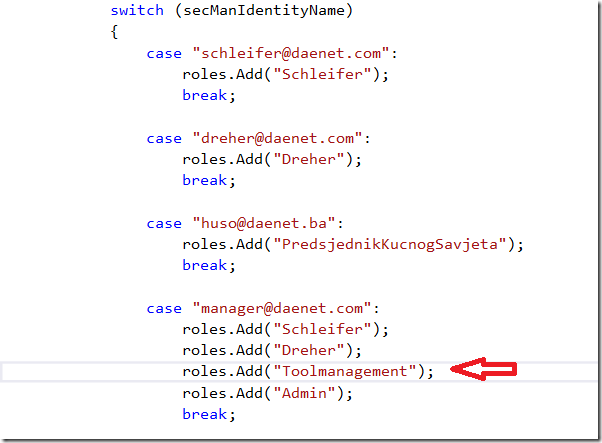
To do this, I will remove decorations from the ValuesController and add it to operation Get.
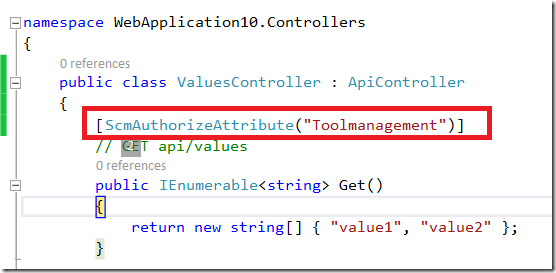
If you start application now, you should get the same result as in previous example. Let’s now remove the required role for provider.
It means the user ‘manager’ left company and we simply remove it from the role, by commenting it out.
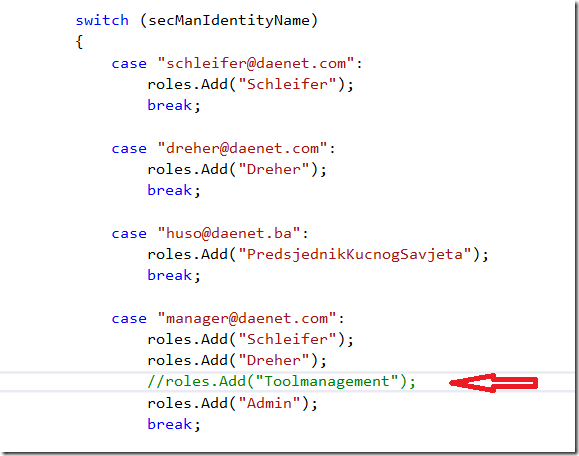
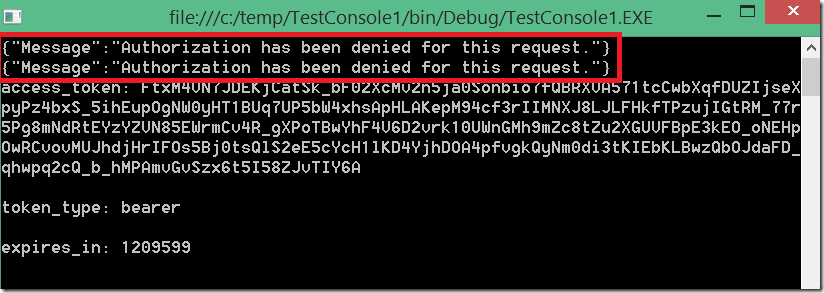
Now, when client sends a request, the identity will not contain the role ‘Toolmanagement’, which is required by operation ‘Get()’.
This will lead as to Access Denied to operation. If you want to specify multiple roles for operation, put all of them coma-separated in attribute.
Posted
May 28 2015, 04:01 PM
by
Damir Dobric