Windows 10 IoT Core is a kind Windows Operative system, which is some incarnation of Windows 10. It enables us to develop .NET and Windows applications, by using common Visual Studio toolset. Even more interesting is a fact that Windows 10 IoT Core can run on PI2 (Raspberry). This enables us to build applications for various devices by targeting of the single code base.
However, open sourced .NET branch call .NET core (also known as DNX = .NET Execution Engine) targets not only windows platform. More about this in this post.
So, I wanted to try to run a .NET Core application on Raspberry PI2 running Windows 10 IoT Core. My idea is to be able to build application on top of .NET Core, which can be without any change be deployed on Linux and IoS. This is not really scenario, which is in Focus of Windows team. This is why this scenario is not very trivial. But as you will see in this post it is not very complicate.
Even if you are not a big fan of IoT and embedded development, I would highly recommend reading of this post, because it describe how .NET Core applications can be built and deployed to any platform. In this post target platform is ARM and PI2 running Windows 10, but it could be any other kind of device and operative system.
What do you need?
- Install Win 10 IoT Core on PI2
Before we start, you will need a Raspberry PI2 with Windows 10 IoT core. See here how to install Windows on PI2.
- Visual Studio 2015
As next next you can use Visual Studio 2015. But note, this is not necessary. I will use it in this post only as editor.
- Install .NET Core
Then you will have to install .NET Core with Dot Net Execution Engine. On this URL you will fond instructions about installing of tool called DNVM (.NET Version Manager). This toll helps installing .NET Core.
To install DNVM run following command in PowerShell:
| –@powershell -NoProfile -ExecutionPolicy unrestricted -Command "&{$Branch='dev';iex ((new-object net.webclient).DownloadString('https://raw.githubusercontent.com/aspnet/Home/dev/dnvminstall.ps1'))}“ |
After installation is completed, you can run following command:

Then you need to install the .NET Core by using of DNVM tool. Following command will install the corecrl
for x64 architecture including latest unstable build.
| c:\>dnvm install -r coreclr -arch x64 latest –u |
Good practice is to install all supported runtimes. Especially in this example, we want to run our application on PI2 device, which is ARM. Following commands will update DNVM tool and install all supported runtimes respectively.
dnvm update-self
dnvm install latest -r coreclr -arch ARM -u
dnvm install latest -r coreclr -arch x86 -u
dnvm install latest -r coreclr -arch x64 -u
dnvm install latest -r clr -arch x86 -u
dnvm install latest -r clr -arch x64 -u
|
As you see, we installed two runtimes corexlr and clr. coreclr runtime is supported for x86, x64 and ARM.
clr runtime (Desktop Version of .NET) is supported on x86 and x64 architecture only.
After installation run dnvm once more and you will see following:
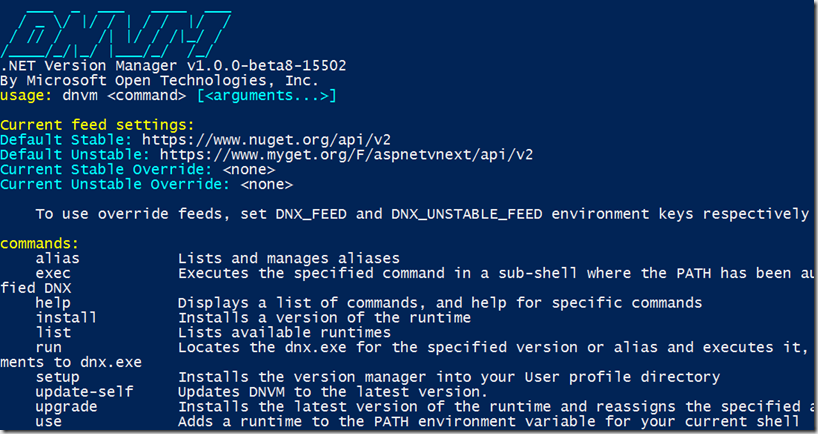
As you see on top, I have installed one stable version /api/v2 and one unstable version aspnetvnext//api/v2.
Even more interesting is following.
This command enlists all currently installed runtimes
|
Active Version Runtime Architecture Location Alias
------ ------- ------- ------------ -------- -----
1.0.0-beta5 clr x64 C:\Users\me.CONTOSO\.dnx\runtimes
1.0.0-beta5 clr x86 C:\Users\me.CONTOSO\.dnx\runtimes
1.0.0-beta5 coreclr x64 C:\Users\me.CONTOSO\.dnx\runtimes
1.0.0-beta5 coreclr x86 C:\Users\me.CONTOSO\.dnx\runtimes
1.0.0-beta7-12364 coreclr arm C:\Users\me.CONTOSO\.dnx\runtimes
1.0.0-beta8-15120 clr x64 C:\Users\me.CONTOSO\.dnx\runtimes
* 1.0.0-beta8-15120 clr x86 C:\Users\me.CONTOSO\.dnx\runtimes default
1.0.0-beta8-15120 coreclr x86 C:\Users\me.CONTOSO\.dnx\runtimes
|
Default runtime is the runtime which will be used to run your application. More about this a bit later.
Additionally to dnvm, there are also two more tools, which you will need. If you did everything correctly both should already be installed:
dnu (.net utility) is used for building and packaging of the application.
dnx is Dot Net Execution Engine, which provides a host for .NET Core application.
As recap, .net core toolsets consists of: dnvm, dnu and dnx utilities.
Implement .NET Core Application
To create an app with .NET
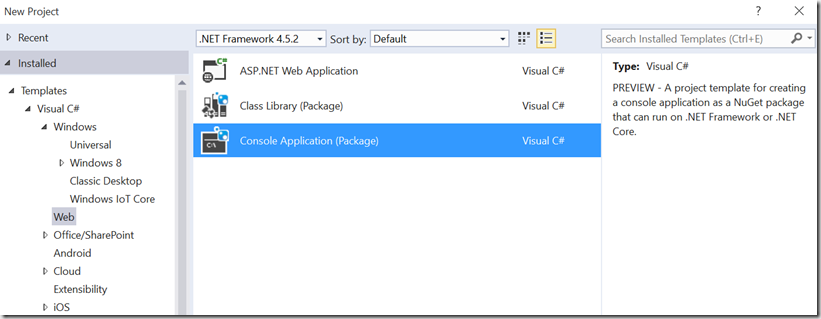
This will create a console application, but you will have to notice few errors.
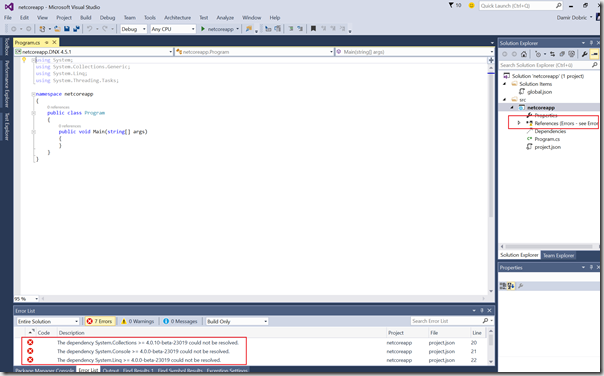
This is not an error. It is just missing tooling support at the moment. We need to restore required packages.
To workaround this, open the command prompt at the place where Visual Studio has created your application.
|
C:\temp\netcoreapp\src\netcoreapp
|
Note that you correct root path must contain project.json file.
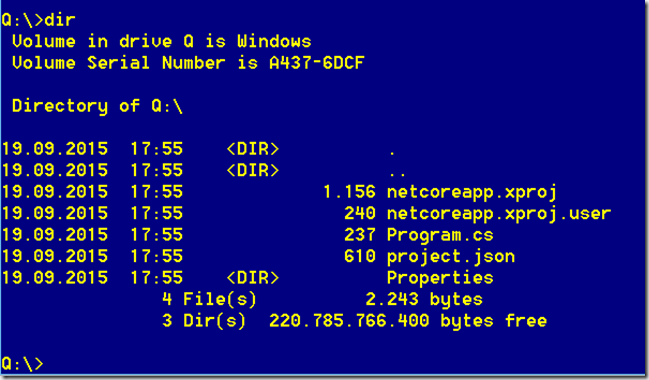
Now, you can execute restore command:
This will restore all required packages
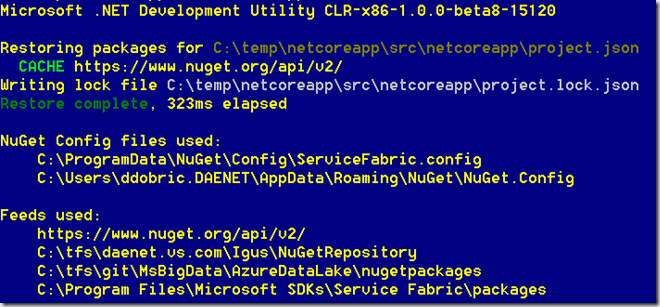
Now, let’s go back in the solution and take a look on a project.json file. The project file looks like:
{
"version": "1.0.0-*",
"description": "netcoreapp Console Application",
"authors": [ "ddobric" ],
"tags": [ "" ],
"projectUrl": "",
"licenseUrl": "",
"dependencies": {
},
"commands": {
"netcoreapp": "netcoreapp"
},
"frameworks": {
"dnx451": { },
"dnxcore50": {
"dependencies": {
"System.Collections": "4.0.10-beta-23019",
"System.Console": "4.0.0-beta-23019",
"System.Linq": "4.0.0-beta-23019",
"System.Threading": "4.0.10-beta-23019",
"Microsoft.CSharp": "4.0.0-beta-23019"
}
}
}
} |
Dnx451 indicates a build for .NET Framework 4.51, which is a desktop version build for system32 subsystem. dnxcore50 is a label for .NET Core. As you see dnx4521 has no any reference included. This is because .NET is distributed traditionally as atomic unit package, which we know under name “.NET Framework”.
In a case of .NET Core all looks a bit different. .NET Core is not distributed. It is open sourced and packaged in various nuget packages. Because of this, your application must explicitly define, which packages (assemblies) will be used. Right now, it is a night mare to guess the right package. But with the time tooling will get better and better and we will know more and more, which functionality is implemented in which package.
please also notice the starting command “netcoreapp”. You can change it in something else if you like. I used in this example:
“go” : “netcoreapp”
Let’s go back now to the solution and write some code. This code is trivial example, which outputs few system information about environment in which the program is running.
public void Main(string[] args)
{
Console.ForegroundColor = ConsoleColor.Yellow;
Console.WriteLine("Hello World");
Console.WriteLine("Machine: {0}, OS: {1}, Processors: {2}",
Environment.GetEnvironmentVariable("COMPUTERNAME"),
Environment.GetEnvironmentVariable("OS"),
Environment.ProcessorCount);
Console.WriteLine(DateTime.Now.ToString());
}
|
When working with .NET Core, you do not need to build the program. Simply execute following command in the command prompt where you executed previously dnu restore.
| C:\temp\netcoreapp\src\netcoreapp>dnx netcoreapp |
This will compile, link and execute the application. Following result appears on my surface pro
Packaging
After the application is finished, we need to package it. There are two different approaches, which might be of interest.
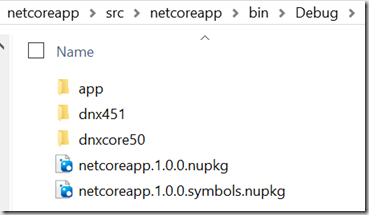
This command will build the package of the application, but it will assume that required framework is already installed on the machine where application will run. Following picture shows the result of build operation.
However, we want to build application, which does not need any prerequisites on the machine. This sounds
as science fiction for last decades, but now it seems to be reality. Because we want to run the application
on PI2, we need to distribute the arm framework as a part of application.
To do this execute following command:
This will output the path to installation root of .NET core related utilities. In my case this is:
C:\Users\me.CONTOSO\.dnx\bin\dnvm.cmd
Now, open the folder: C:\Users\me.CONTOSO\.dnx\runtimes
You will see there something like this:
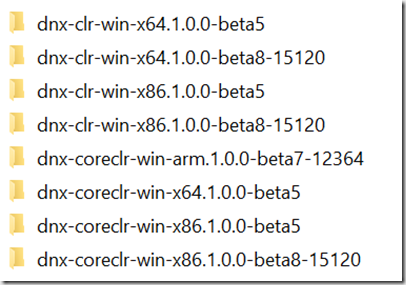
Now, copy the ARM runtime name in clipboard and paste it in following command:
| dnu publish --out "c:\something" --no-source --runtime dnx-coreclr-win-arm.1.0.0-beta7-12364 |
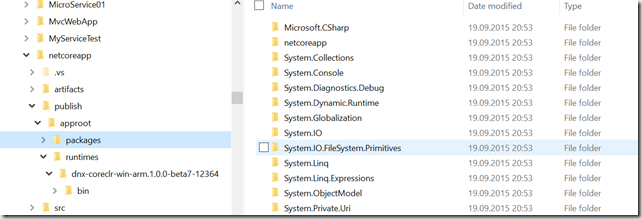
After execution, this command will generate the self contained application including the runtime.
This is the result. All required artifacts are saved in folder ‘publish’. Note that c:\something is obfuscated path. Picture shows the real path.
Deployment to PI2
Deployment of application to device is nothing than copy paste. You simply need to copy all files generated in packaging process to some folder on device.
To do that we first have to establish the PowerShell session to device.
First, we have to start WinRM service on development machine:
Then we have to add the machine (PI2 device) to list of trusted hosts.
| Set-Item WSMan:\localhost\Client\TrustedHosts –Value 192.168.0.79 |
As next, we have to establish the PowerShell session with device:
| Enter-PSSession -ComputerName 192.168.178.79 -Credential Administrator |
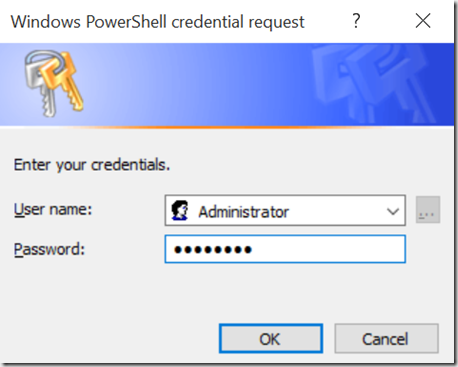
After that dialog for credentials will appear and you should enter the password. Then you will have to wait approx. 1-2 minutes.
After the session is established, we have to copy files somehow to device. The easiest way to do this, go to Windows IoT Core application. You can now use File Manager or command prompt. It is up2you.
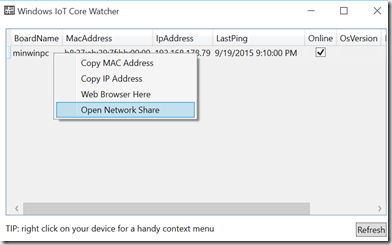
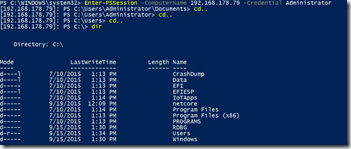
Here you can see all files on PI2 device.
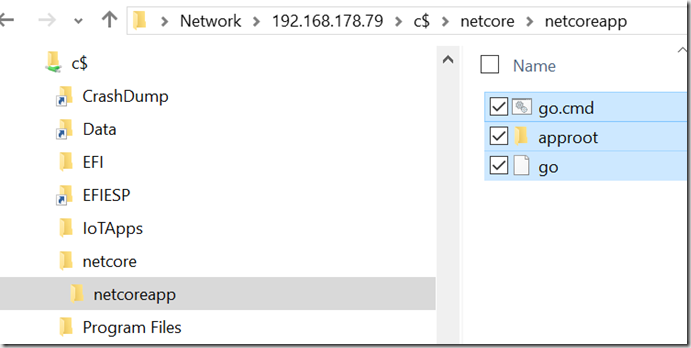
Now go to PowerShell command prompt with establishes session to device and navigate to folder where you have copied application package files. In my case this was folder ‘C:\netcore\netcoreapp’.
Finally start application
| [192.168.178.79]: PS C:\netcore\netcoreapp> .\go.cmd |
If all works fine you will see following result:

Posted
Sep 22 2015, 06:44 AM
by
Damir Dobric